Our purpose here is not to teach flint knapping, but to acquaint you with a basic understanding of the process of ancient stone working and the use of the tools you may find in the fields you hunt.
PROCUREMENT:
The first step in stone working is to locate and retrieve the stone material. The procurement site will appear as a rock face or outcropping of workable stone, often along a stream that has eroded the soil around it.
Some sites are small and obscure and appear as small openings in the woods while others are large and may stretch for miles along rivers like the Flint River in Georgia.
These sites are often littered with broken fragments of stone and broken tools. There will usually be obvious places where stone has been broken and removed within the site. There may also be any number of preforms that scatter the surface as was the case at Lake Marion in Alachua County, Florida. Large holes may also have been dug into the earth as there was at the Senator Edwards site in Florida.
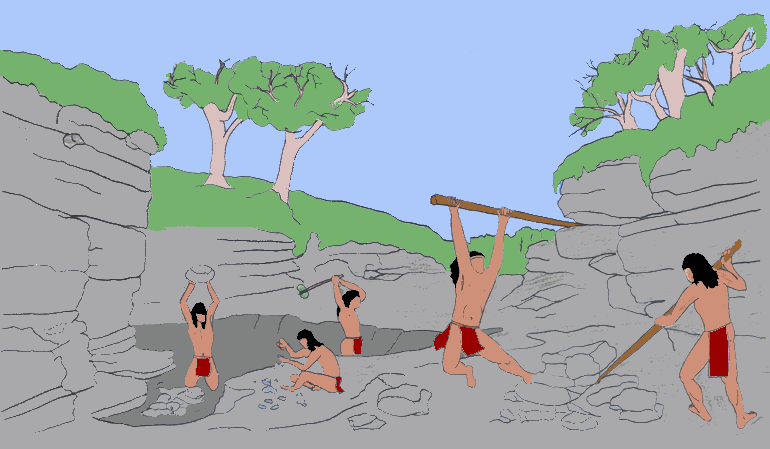
The tools of procurement will include digging sticks, often made of wood or bone that were used to free the rock from the soil. Larger rocks may also have been used to smash chunks of stone from boulders. These rocks will show crushed or broken edges.
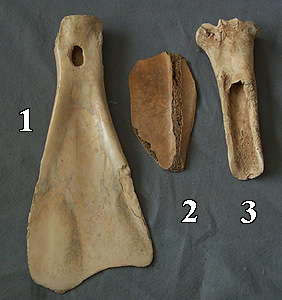
Digging tools were made of bone, wood or stone. Wooden tools will most often parish while bone is sometimes preserved under the right conditions. Stone tools include hoes and adzes that may appear heavily damaged.
Heavier tools for digging were sometimes used to loosen large rocks or dig deep holes. These include heavy adzes and malls for breaking rocks.
SPALLING:
Once the large rocks were loosened and could be worked, they had to be broken into usable sections that became usable, referred to as cores. Hafted malls or very large hammer stones were used for this purpose.
A mall is more often a rock with a groove for hafting than a finely worked tool. Given their abusive purpose, they were not expected to last long before needing replacement.
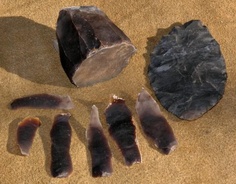
Once the broken section of parent rock was made, long, broad flakes called spalls could be chipped off from the edges by striking the flat broken surface of the core with a hammer stone. These flakes were then ideal for making knife blades or projectile points. Hammers used in the spalling process were usually large and were often badly damage or broken in pieces.
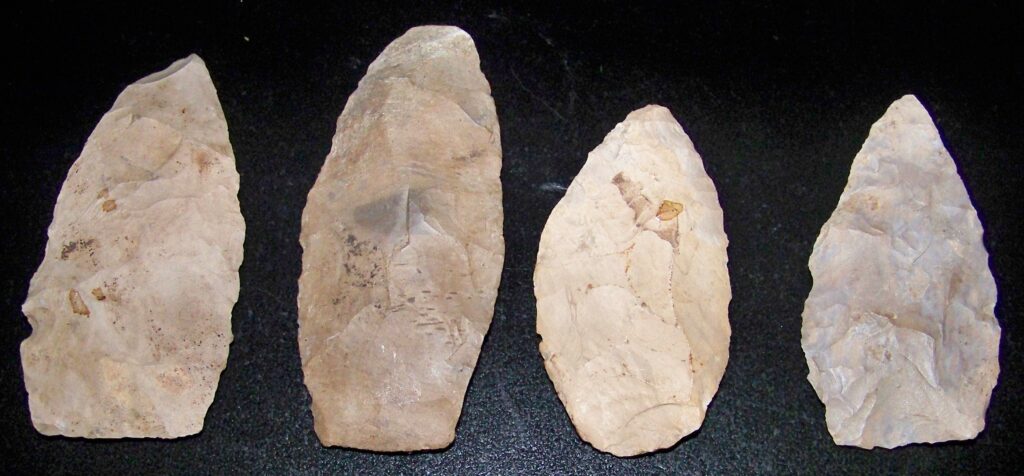
Once the spalls were made, they were formed into leaf-shaped quarry blanks or preforms. The completed point was rarely formed at the quarry site. Shaping the preform required percussion flaking that was done through the use of billets made of antler, bone, wood or stone. Few if any wooden billets have survived.
Hammer stones were also used in the shaping of preforms and may be found at quarry sites. Hammer stone came in many sizes, but like the mall, their life was short due to their abusive purpose. Some hammers are large and broad while others are thin, depending on the size of flake that was needed. A few hammer stones were shaped with one thick and one thin edge for dual usage. Most of these stones have a small dimple pecked into one or both sides of the disc and are sometimes confused with biscuit discoidals. The major difference between the two is that the edges of a nicely shaped hammer stone are rough to bite into the edge of the chert quarry blank while the edges of the biscuit discoidal are smooth.
Once a sufficient number of quarry blanks are completed and the Indian returned home, the blanks were often buried in the earth for safe keeping until they are needed. That is why several blanks are often found in a cache. A cache can number from a few preforms to more than twenty blanks.
REDUCTION:
The next stage of lithic production is reduction, meaning that the quarry blank or preform is removed from the soil and worked into the desired blade or projectile point. This stage of the work was done in a site type called a reduction site or chipping station. The location of this site is usually a short distance from the campsite to prevent sharp flakes of stone from being left on the ground where they may cut the feet of family members. This site can be identified by the hundreds of small to medium flakes scattered across it along with a few broken hammer stones and broken blanks. Broken blanks are often the result of unseen cracks in the chert. A strike in the wrong place will break the preform. When this happens, especially in the later stages of flint knapping, it can result in “emotional distribution.” One end of the blade finds its way to one end of the site and the other end lands hard in the opposite direction.
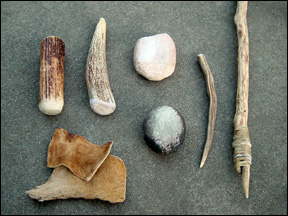
The reduction stage requires some specialized tools that can include antler batons or billets, stone hammers, abraders or grinding stones to dull the preform edges and stone or antler flakers. Stone flakers (center row) are often not recognized in sites. Flakers are used after the percussion work is done to straighten the blade edge, add serration, and later to resharpen used blades.

Percussion flaking is used to further develop the blade shape. This process was accomplished through the use of hammer stones or billets made of antler or wood, generally removing broad shallow flakes across the surface of the blade. On Paleoindian points, this process often results in what is called “over shot” flaking, where the flakes travel across the blade face past the center line, often reaching the opposite side of the blade. By the Early Archaic period, over shot flaking had been abandoned and flakes generally traveled to the center line, often forming a hump or “median ridge” along the center of the blade. Percussion flaking was usually done randomly in a way that addressed the features of the stone. On some very workable stone, flakes could be taken off evenly and could meet in the center of the blade at regular intervals. This process is called collateral flaking.
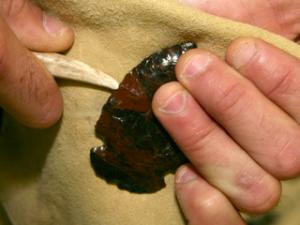
Once the general shape of the blade is complete, pressure flaking is used along the blade edges to even and straighten them. This process was done with an antler tine. Broken antler points may be recovered from some reduction sites. At this point, the removal of fine flakes usually causes some degree of serration that leaves a very sharp edge. Some point types are more deeply serrated and are intended to remain as part of the diagnostic characteristics of the blade. These serrations are also added through the use of antler flakers.
Finally, the blade is prepared for hafting or fastening it to a handle or shaft. Throughout the Archaic period, this usually meant the forming of notches or a stem. Notches were formed using an antler tine that may have been ground to a narrow point to reach into the notch, or notches may have been punched using a bone or antler punch and an anvil. The side notches of the Early Archaic period soon gave way to corner notching and finally to stemmed basal structures. Basal smoothing or grinding along the basal edge and hafting area was also soon abandoned.
The Osceola point has an incurvate basal edge for a solid-core handle while the Bolen point had both incurvate and excurvate basal edges for either solid or hollow-core handles. Handles were often fashioned from large sections of antler.
Hafting a blade was done with a solid-core material like wood or antler or with a hollow-core material like cane or bone. The material selected for hafting often determined the shape of the basal edge of the blade. Excurvate, rounded, stemmed, or pointed basal edges worked best in hollow-core handles while solid-core handles required flat or incurvate basal edges to stabilize the point.
Whatever handle material is selected, some kind of adhesive or pitch was used in conjunction with sinew lacing to secure the point in place. In some cases, a glue was made from antler or bone, but other materials consisted mainly of tree sap that was gathered up and formed into balls of the stick substance that was then suspended on a stick (above: note the hole in the view on the right). The substance would dry and could be softened by heating whenever needed.
As blades were repeatedly used and edges became dulled through use, the antler flaker was again used to resharpen the blades. Flakes were removed bi-facially, quickly reducing the size of the blade, or through beveling that removed less material, allowing the blade to last as much as six times longer. Blades often become unbalanced with one side being broader than the other, sometimes to the point that one edge would be completely used up into the thick central point of the blade. Because blades were resharpened after the hafting process, this unbalanced development was probably due, at least in part, by the “feel” of the handle more than the blade function.
Eventually the blade was completely used up. If the process had reduced the length of the blade, only a nub may remain while the hafting area was still intact. If the blade length had essentially been maintained, the point may then be used as a drill or perforator until it was completely exhausted.
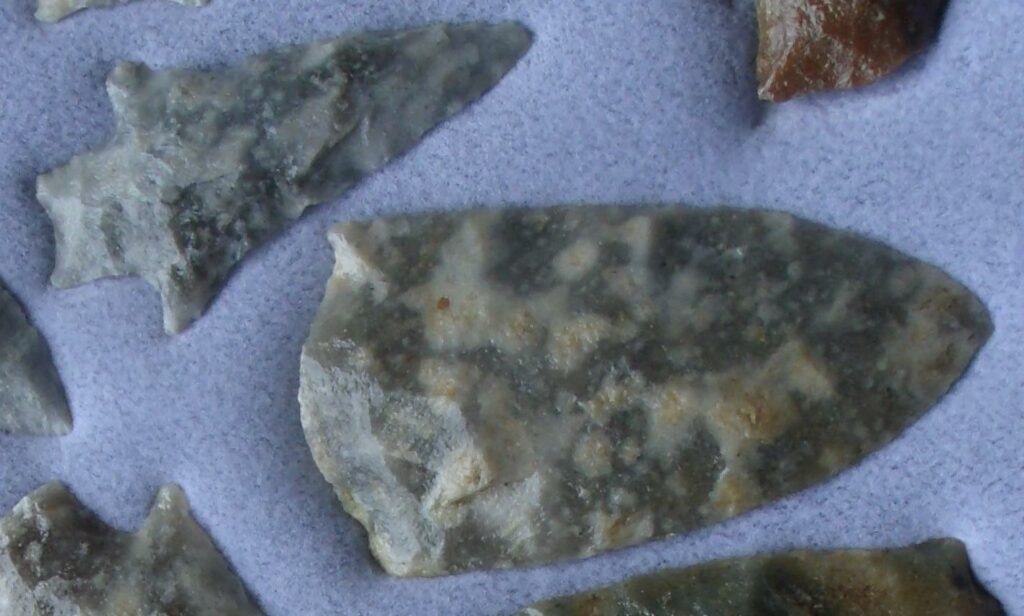
Tallahatta Sandstone, also known as Tallahatta quartzite, is a light gray quartz arenite with a distinct snow-flake pattern. The name Tallahatta comes from an Indian term meaning “white rock.” This name is appropriate for the formation, which is light in color where it is exposed at the surface. It was one of the most common lithic materials used by prehistoric peoples in south Alabama.
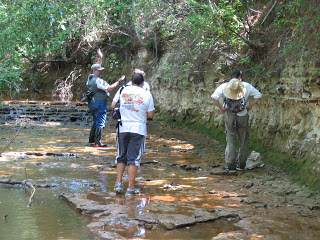
Perhaps the most noted exposures of this formation are the off-white claystones seen in the vertical road cuts west of Meridian, Mississippi, on Interstate 20. Outcrops of erosion-resistant Tallahatta lithologies form a series of ridges and hills known as the Tallahatta cuesta. This cuesta extends from the formation’s type locality in the Tallahatta Hills of southern Alabama northwest ward through Lauderdale County, Miss. and into north-central Mississippi. Tallahatta Sandstone is interbedded in some areas with Tallahatta Chert, which is a seam material in some portions of the formation.
The Tallahatta Formation is Middle Eocene in age and consists of silicic claystones, sands, and sedimentary quartzites of marine origin. The quartzites are composed of well-sorted, medium grained quartz sand that is hardened by weakly luminescent phases of opal-CT, chalcedony and some glauconite cemented together by silica. This binds the grains together so strongly that when broken, the fracture cuts through individual grains rather than around them as it would in sandstone. Tallahatta quartzites have a characteristic gray to white sugary texture with scattered dark grains of glauconite. Along a broken surface, fracture surfaces of individual quartz sand grains are slightly inclined to that of the matrix. This gives fracture surfaces a sparkling appearance. The snowflake pattern is caused by patchy distribution of chert cement.
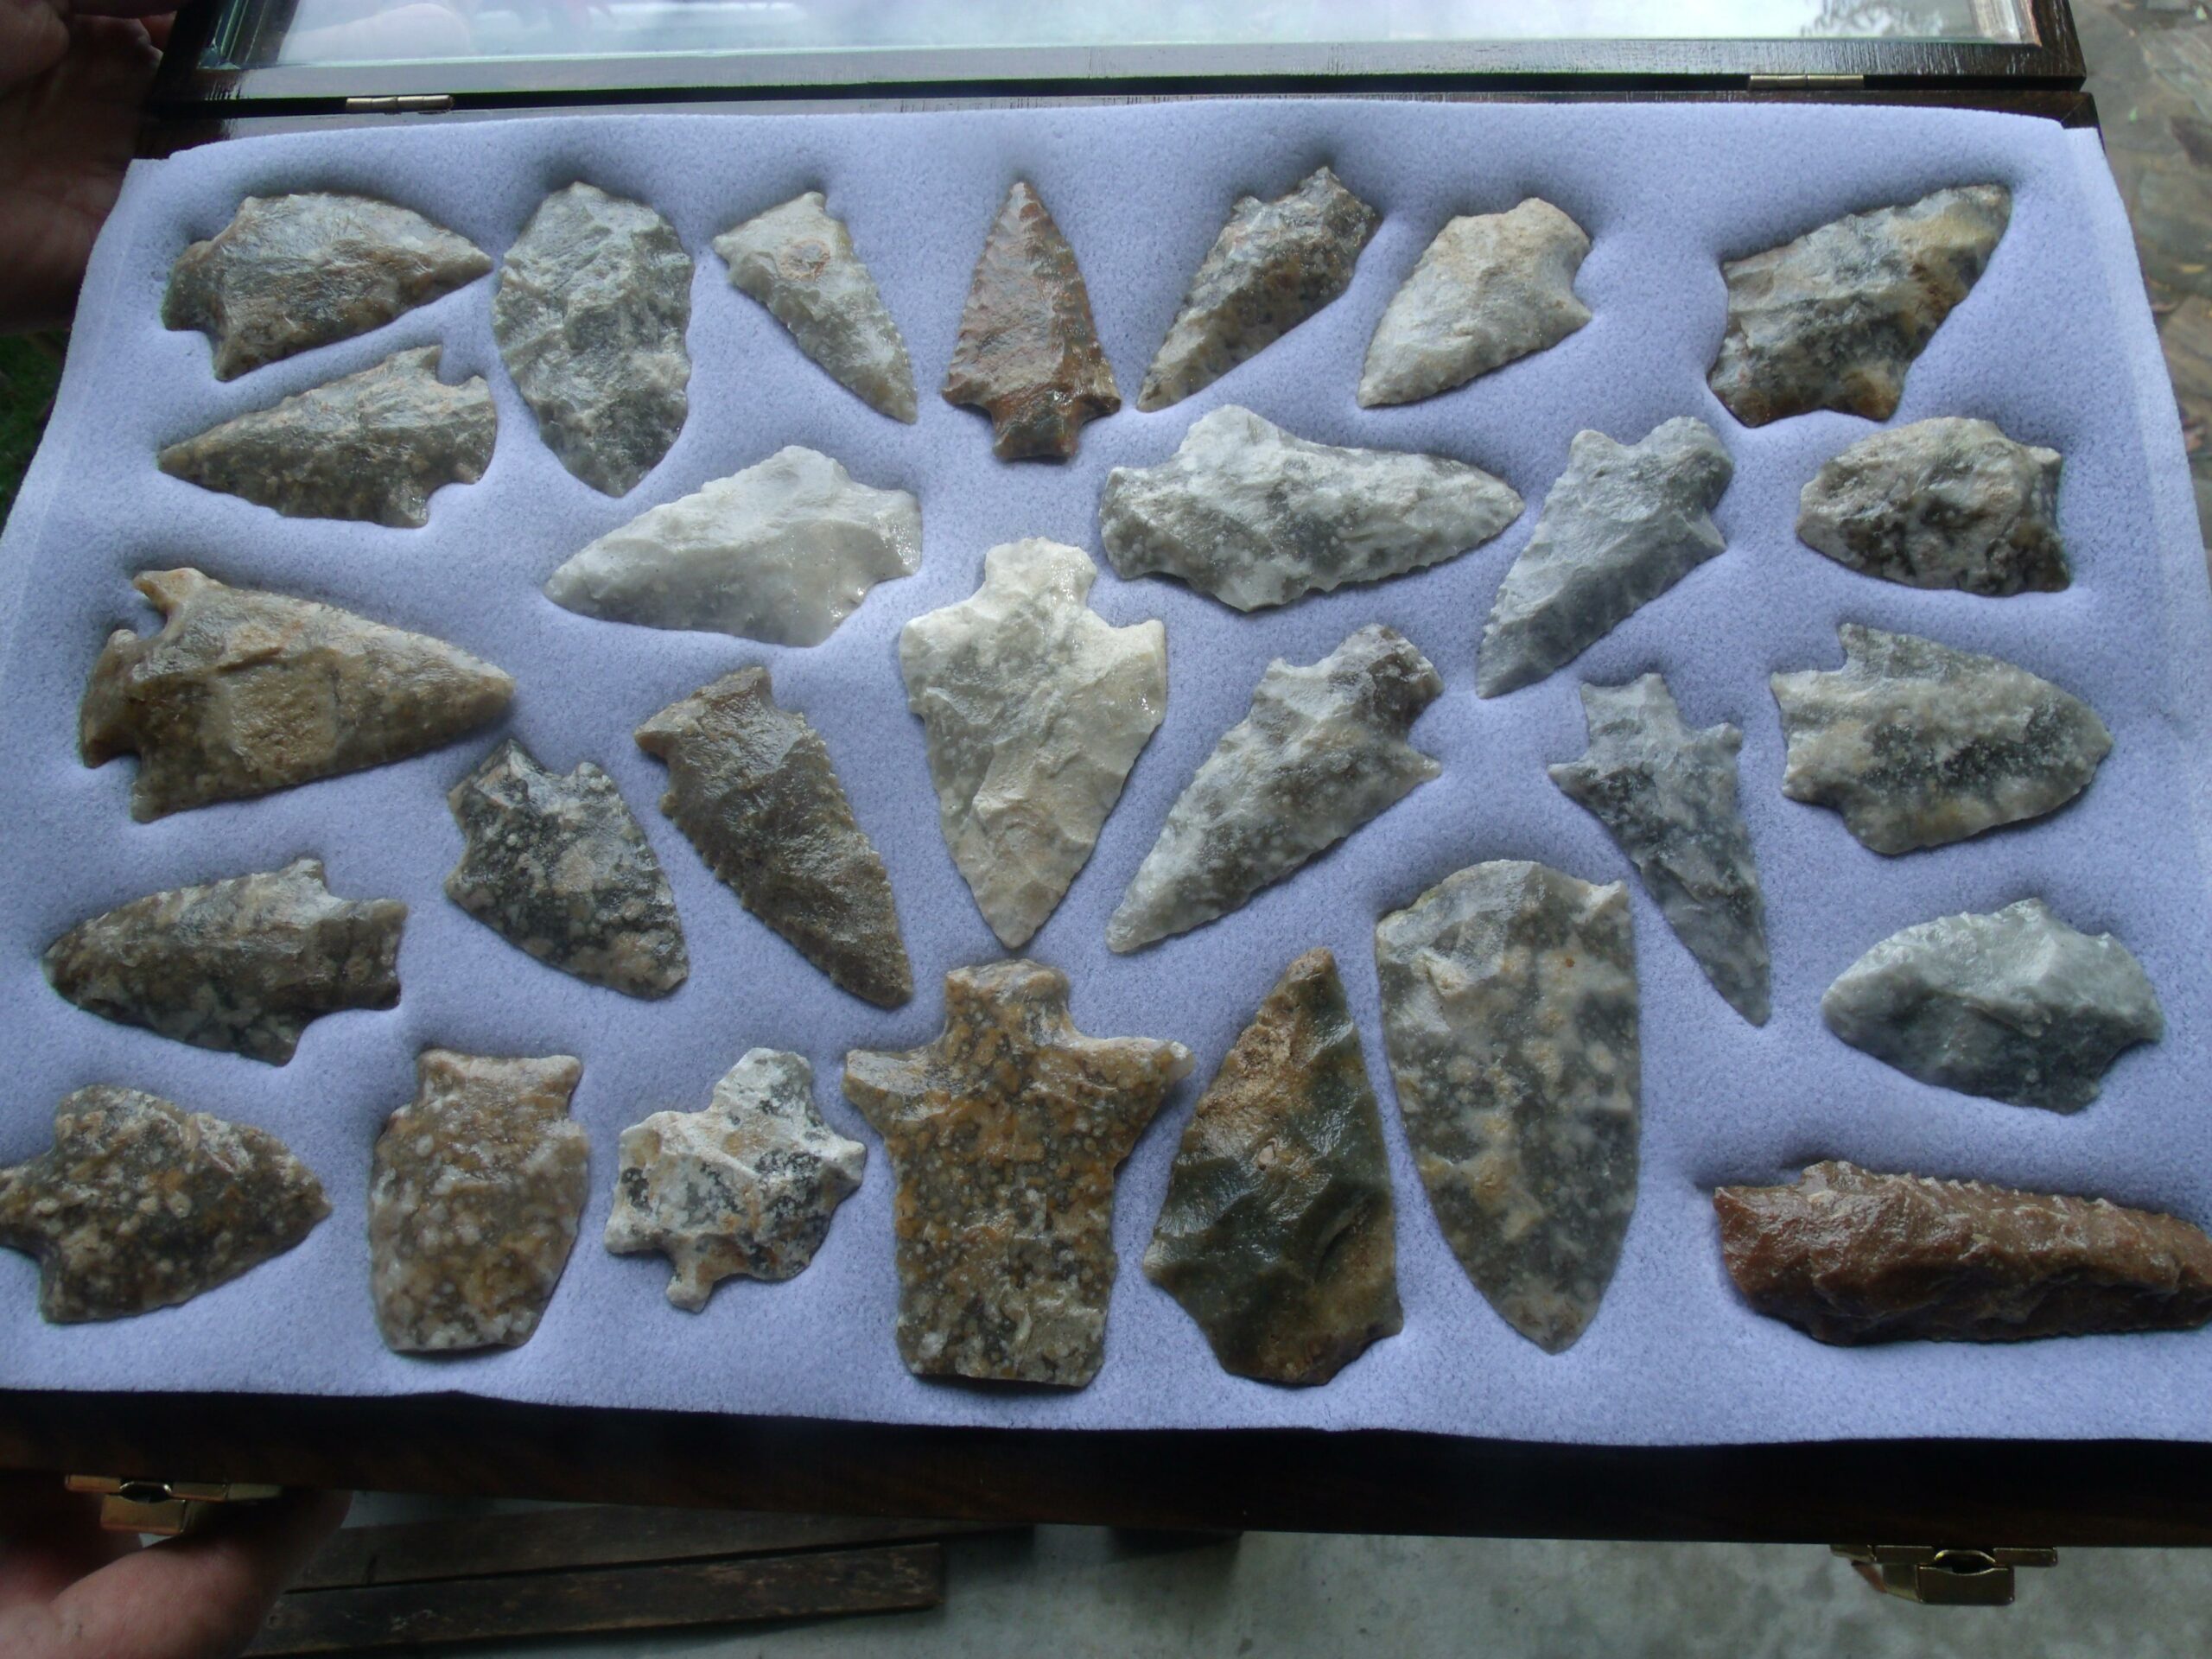
Tallahatta quartzites are unique among coastal plain rocks for their hardness and durability. Tallahatta Sandstone was employed in the region to make a wide variety of stone tools, from the earliest documented settlement during Paleoindian times (circa 15,000 years ago) up until contact with Europeans. Early settlers used these rocks for millstones. While quartzite ledges of a foot or Jess in thickness are common in the Tallahatta Formation, only a few are of the quality needed for knapping tools. These tools have been recovered from sites hundreds of miles from the source. For this reason, the Indians prospected for outcrops or stream beds with the high quality stone. Studies of Alabama quarry sites have shown that Tallahatta Sandstone is the most widely distributed of the three major knappable stone types in south Alabama and has the most identified prehistoric quarries. Sites for this stone were discovered and rediscovered over a period of several thousand years by various Indian groups.